# Card Management
Edit and manage your employees' card information
# Edit the text fields of a vcard
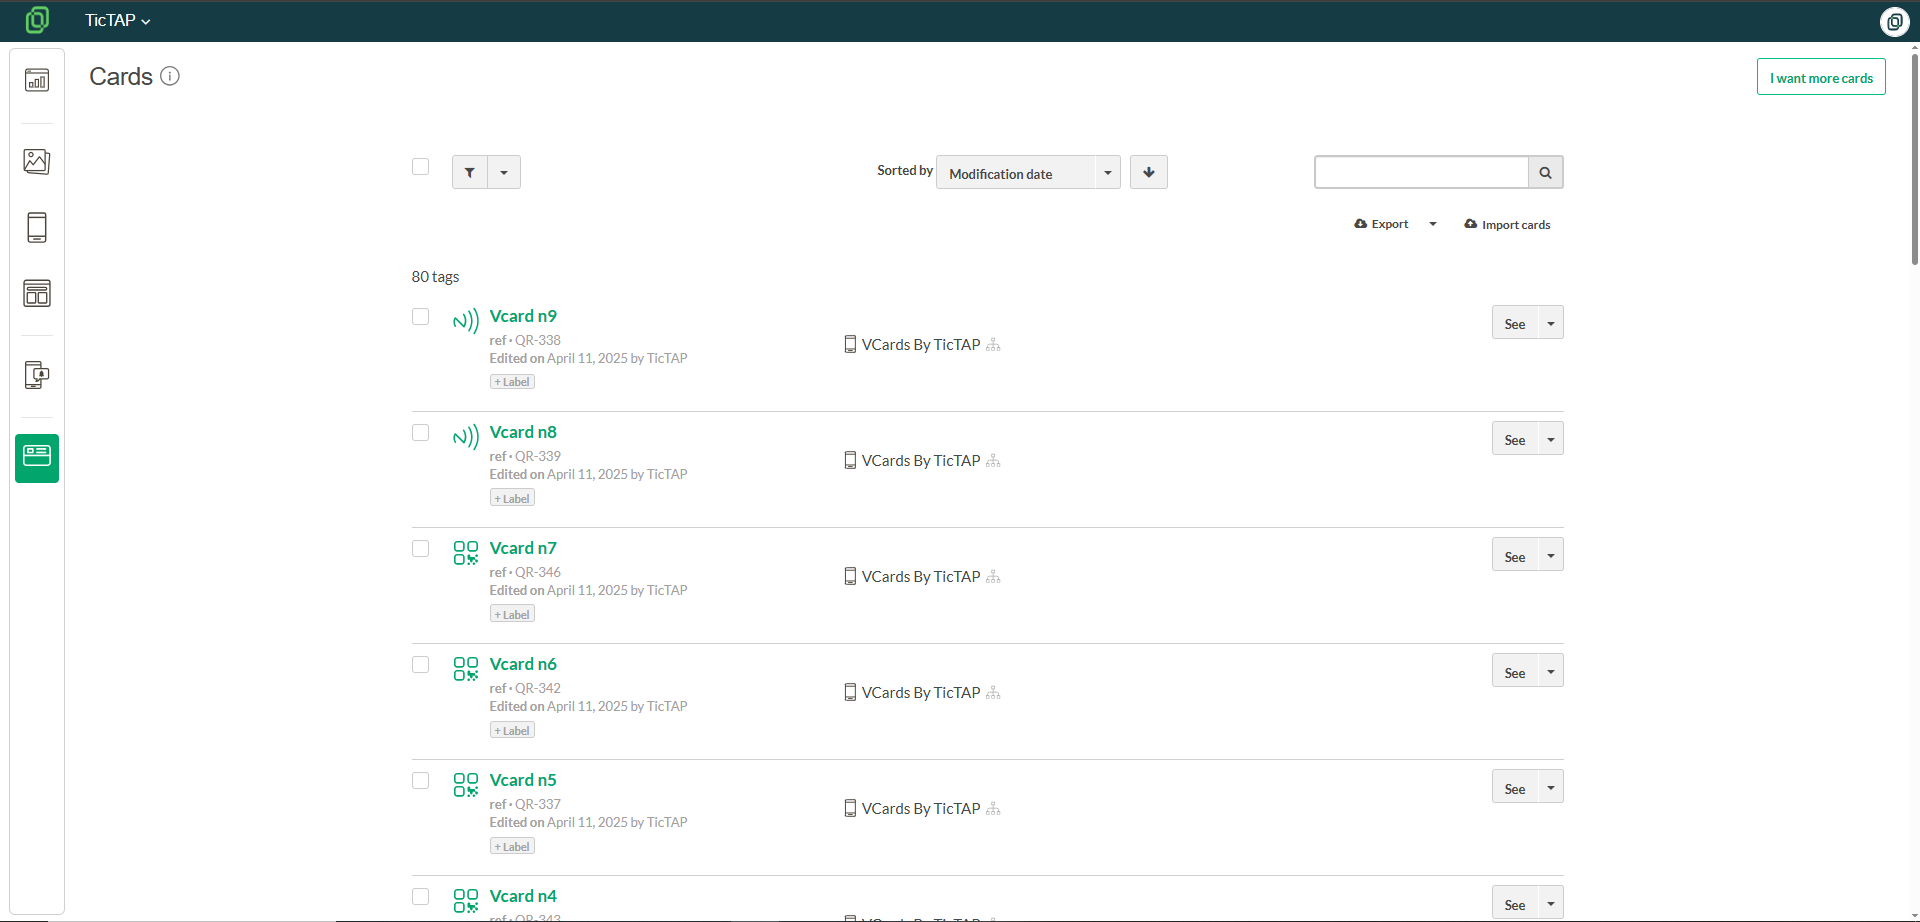
The **Cards** section in the left sidebar menu is where you can view, edit, and manage all your team's cards. To edit card details, such as **changing the position** or a **mobile number**, follow these steps:
1. Locate the name of the person you want from the **card list**
[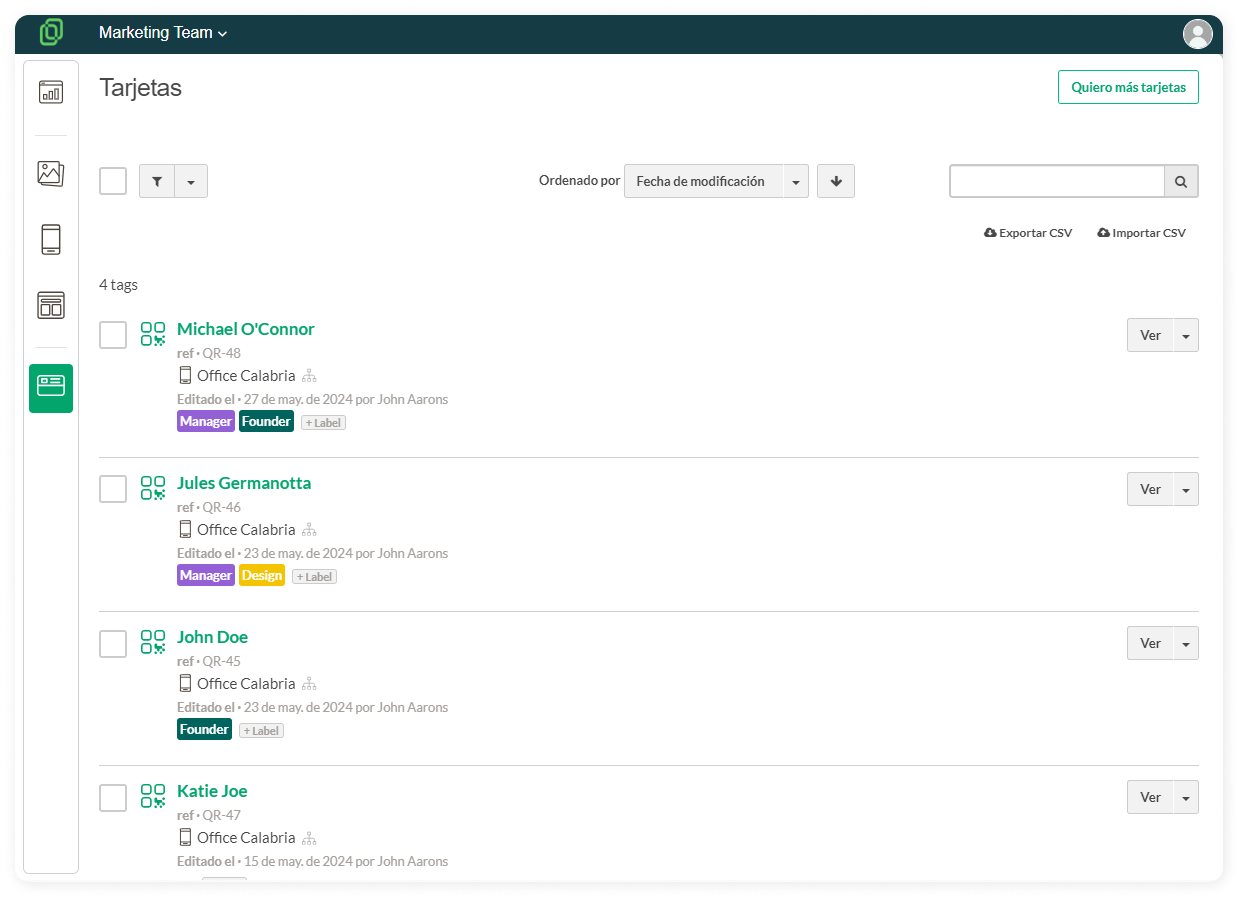](https://help.tictapcards.com/uploads/images/gallery/2024-06/KX5lLQgsv7YtLzRY-frame-23647.png)
3. In the dropdown menu on the right-hand side, click on **Edit**
[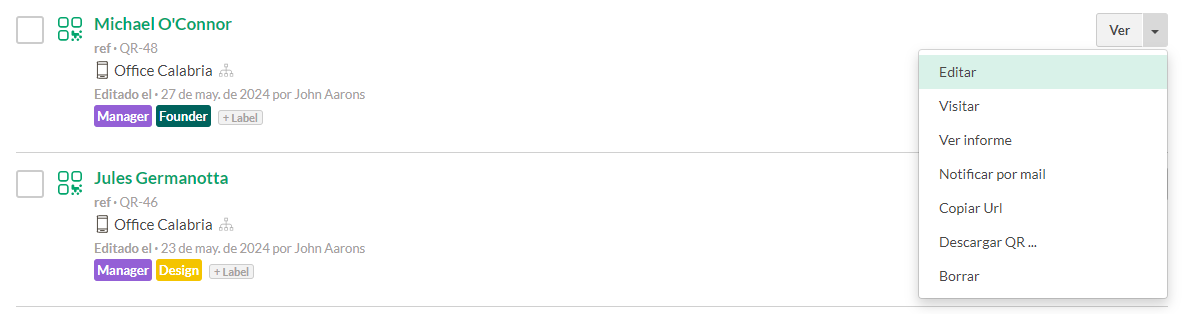](https://help.tictapcards.com/uploads/images/gallery/2024-06/eUe37uA1JTIwL7d5-image-2.png)
4. Now you can modify any field on the card, and when you click **Save**, it will be updated on the corresponding vcard
[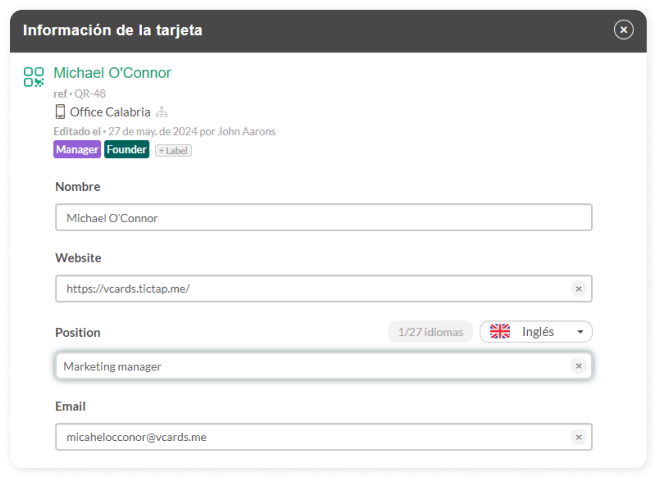](https://help.tictapcards.com/uploads/images/gallery/2024-06/BrrHu2qTYsDYxR6c-info-tarjeta.png)
# Order more blank cards
Here you can create cards without needing to add any information.
You can add it later, whenever you need to.
It’s important to fill in the details before printing the cards.
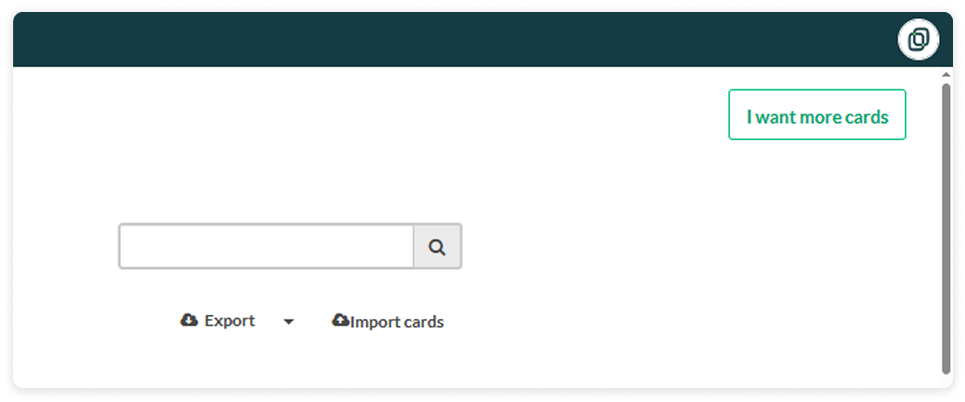
1. From the Cards section, click the **I want more cards button**, you’ll find it in the top left corner:
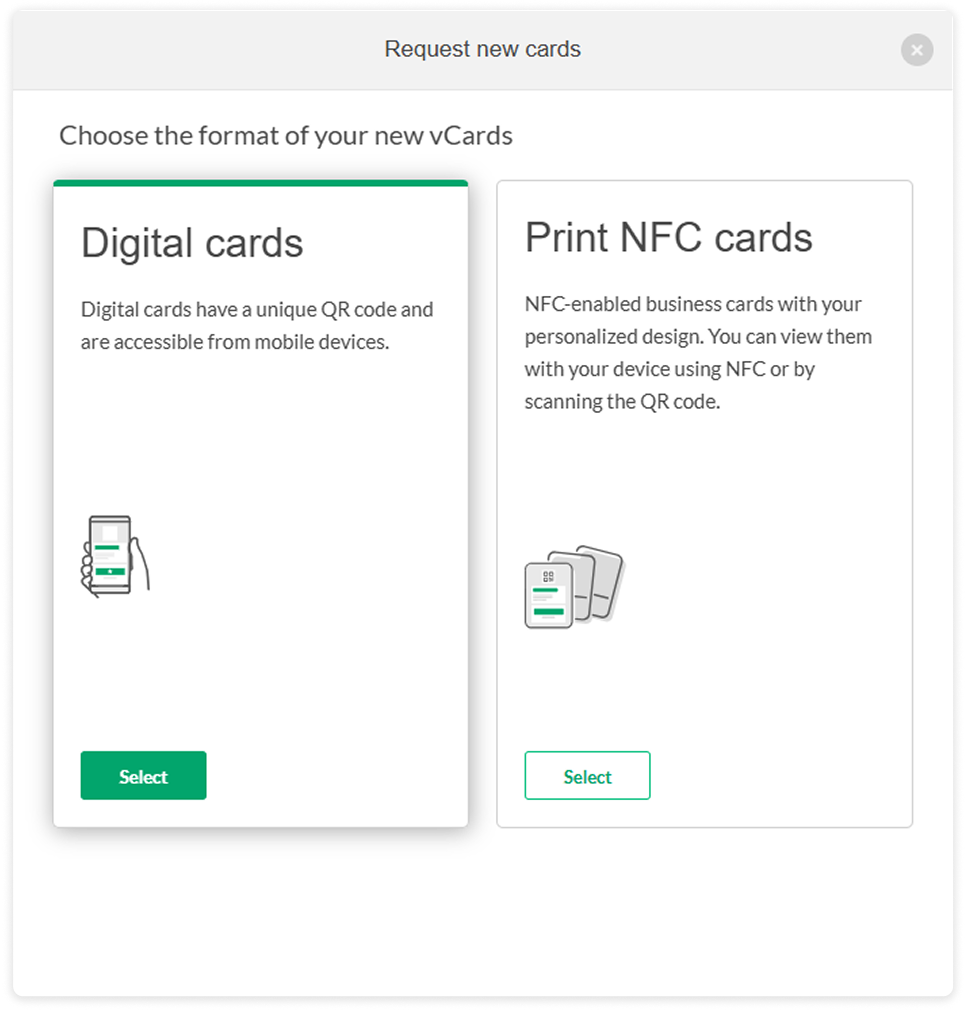
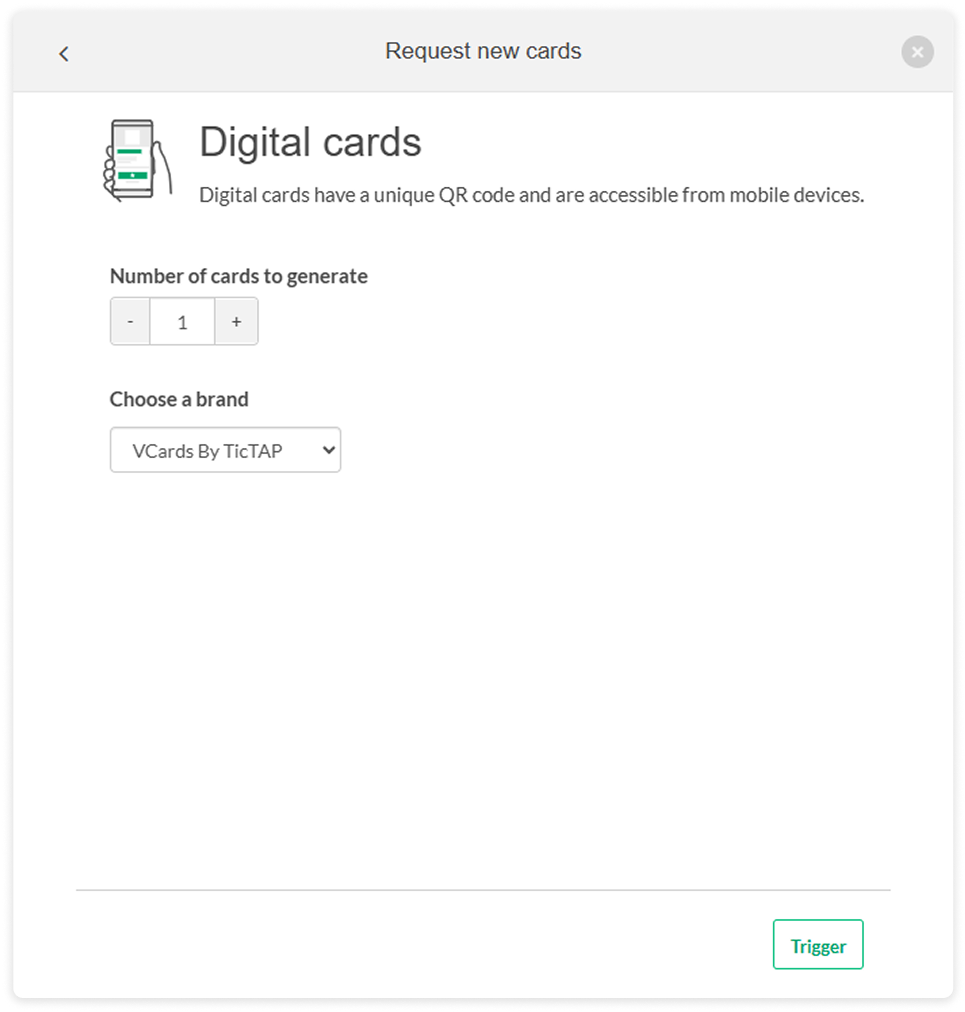
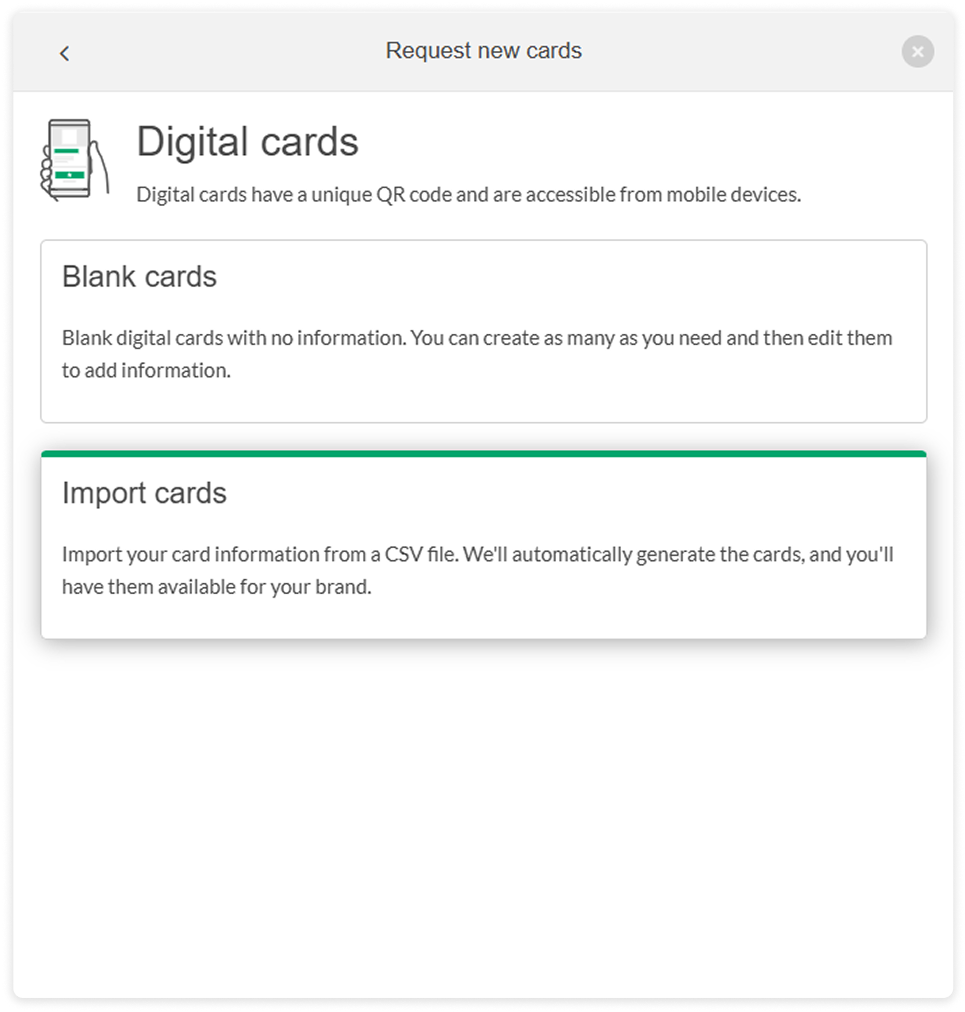
2. The following panel will open, and we’ll click on “Digital Cards”.

3. Blank cards: They are created instantly, and you can edit the details after requesting the new cards.
4. Choose the quantity and brand of the new cards. Once you generate them, they’ll be ready in just a few seconds!
5. If you want to modify the data, [you can do it using this guide.](https://help.tictapcards.com/books/card-management/page/edit-the-text-fields-of-a-vcard)
# Create new cards using databases
You can complete all the information using a database, use your own or download our template.
1. From the **Cards section**, click the I **want more cards button**, you'll find it in the top left corner.
2. The following panel will open, and we will click on "QR Digital Cards"
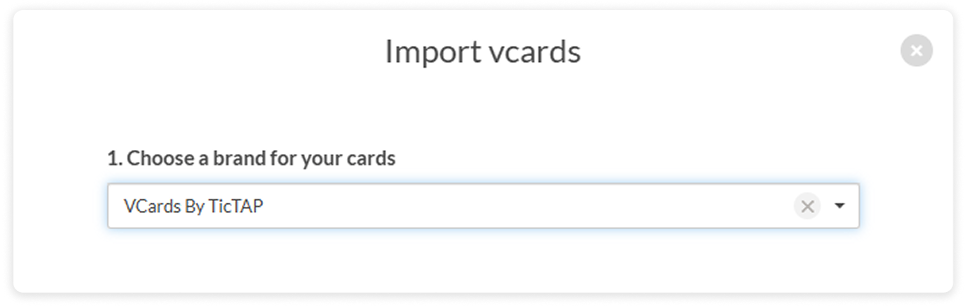
3. Now let's import the cards from a database.
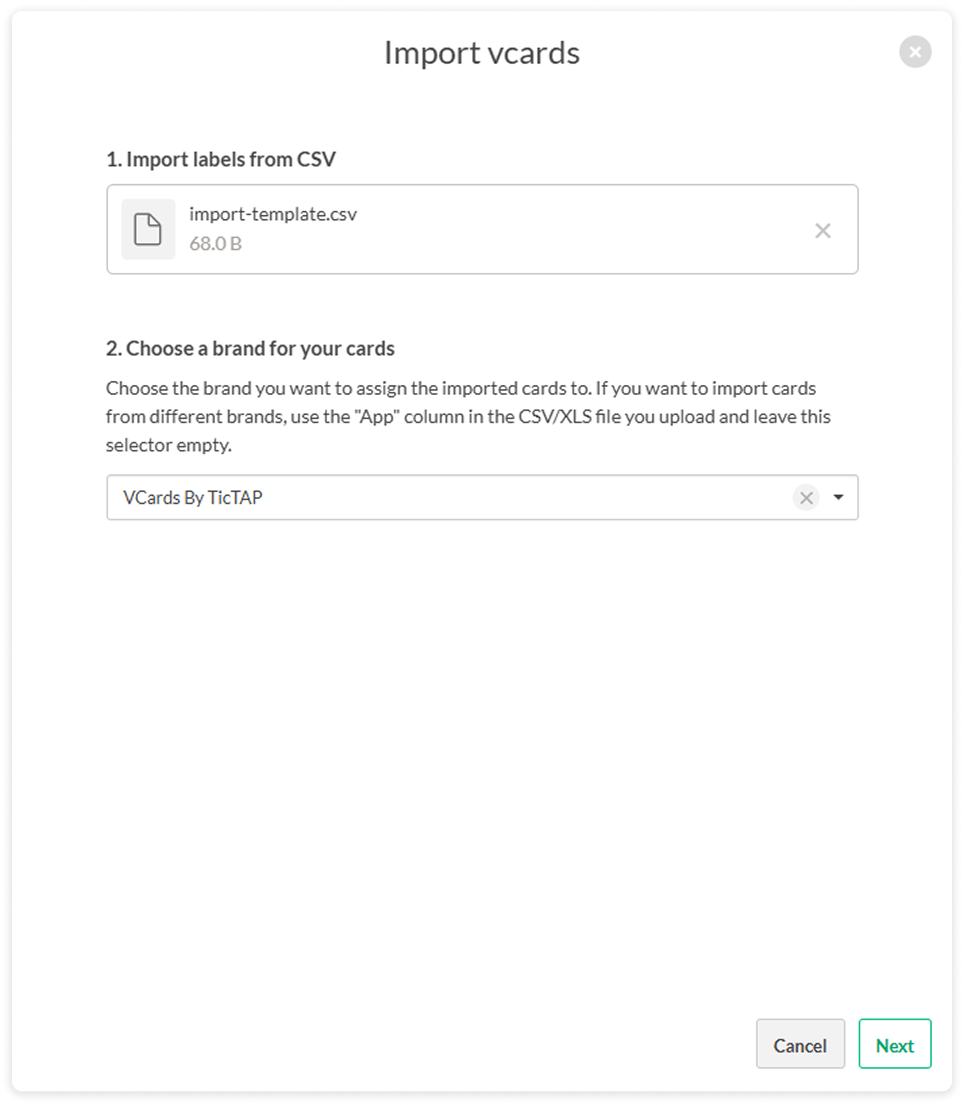
4. The first step is to select the brand for the cards.
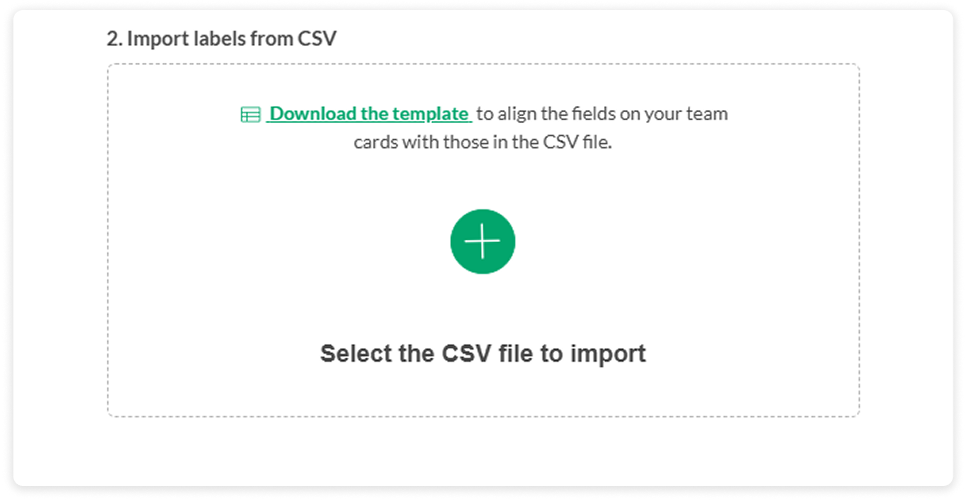
5. We can also drag and drop or select the existing database from a folder.
Keep in mind that the format must be .CSV
6. If you don’t have a database, you can download our template and fill it in with your data.
7. We verify that the file and the brand are correct and proceed to the next step.
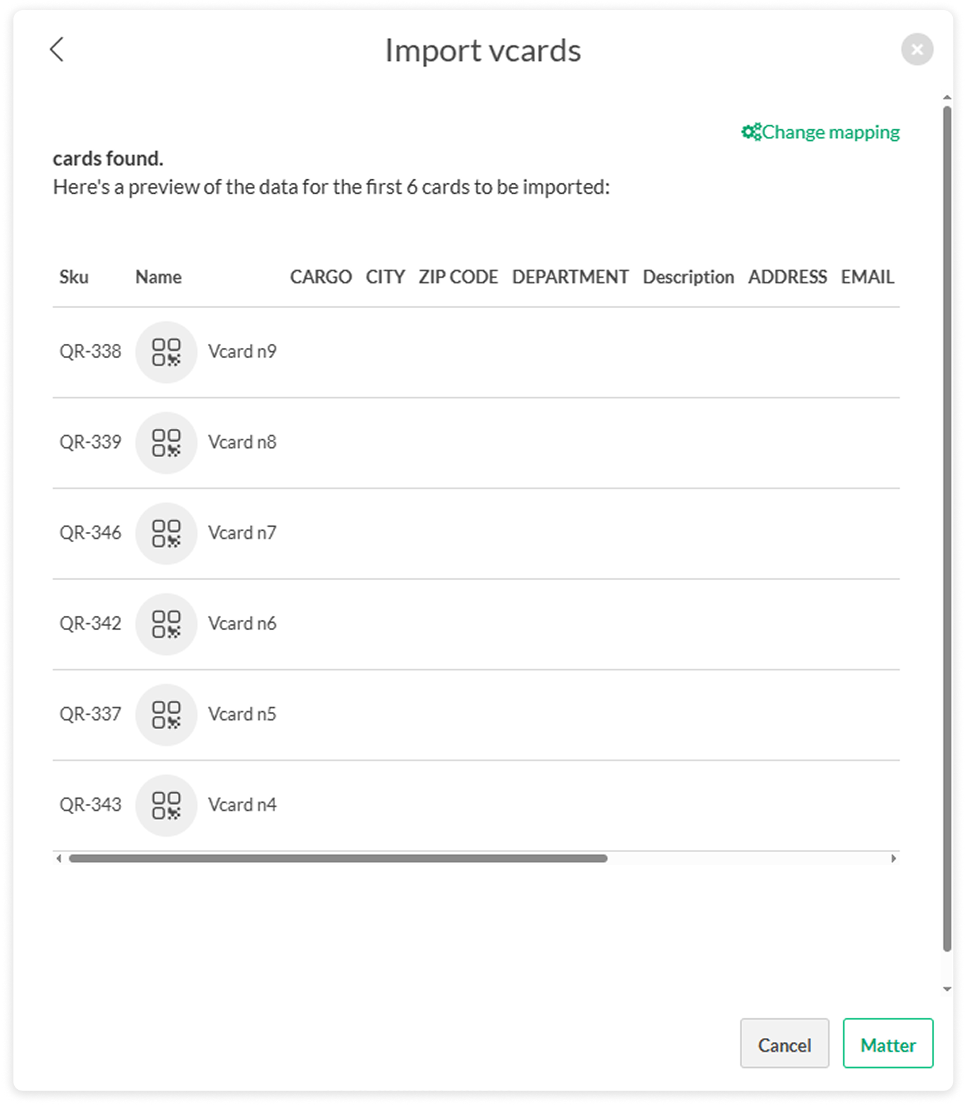
8. Now let’s check if everything is correct with the data preview and validation, we don’t want any surprises!
You're good to go!
# Print NFC cards
Once you have your digital cards with all the information verified, you just need to follow these steps to print the vCards you need.
1. **From the Cards section**, click on the I **want more cards button** — you'll find it at the top right.
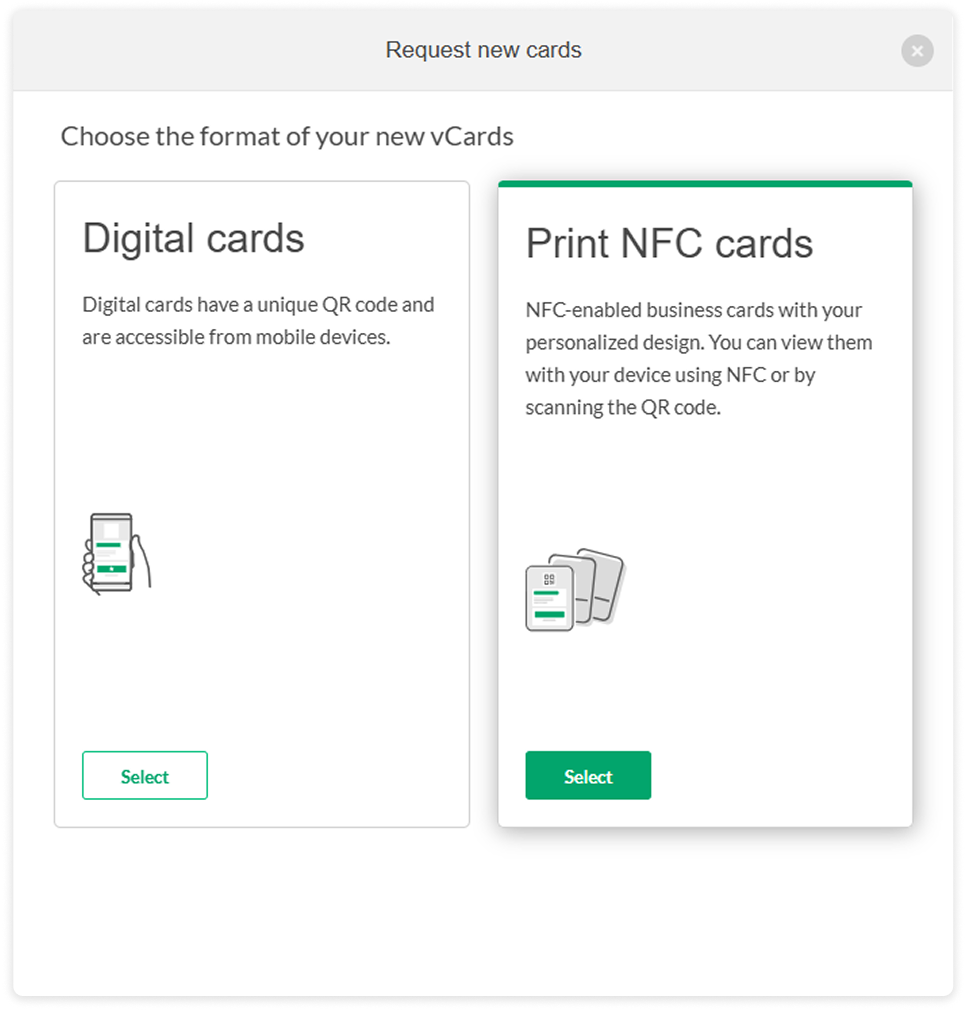
2. The following panel will open, select **"Print NFC cards"**.
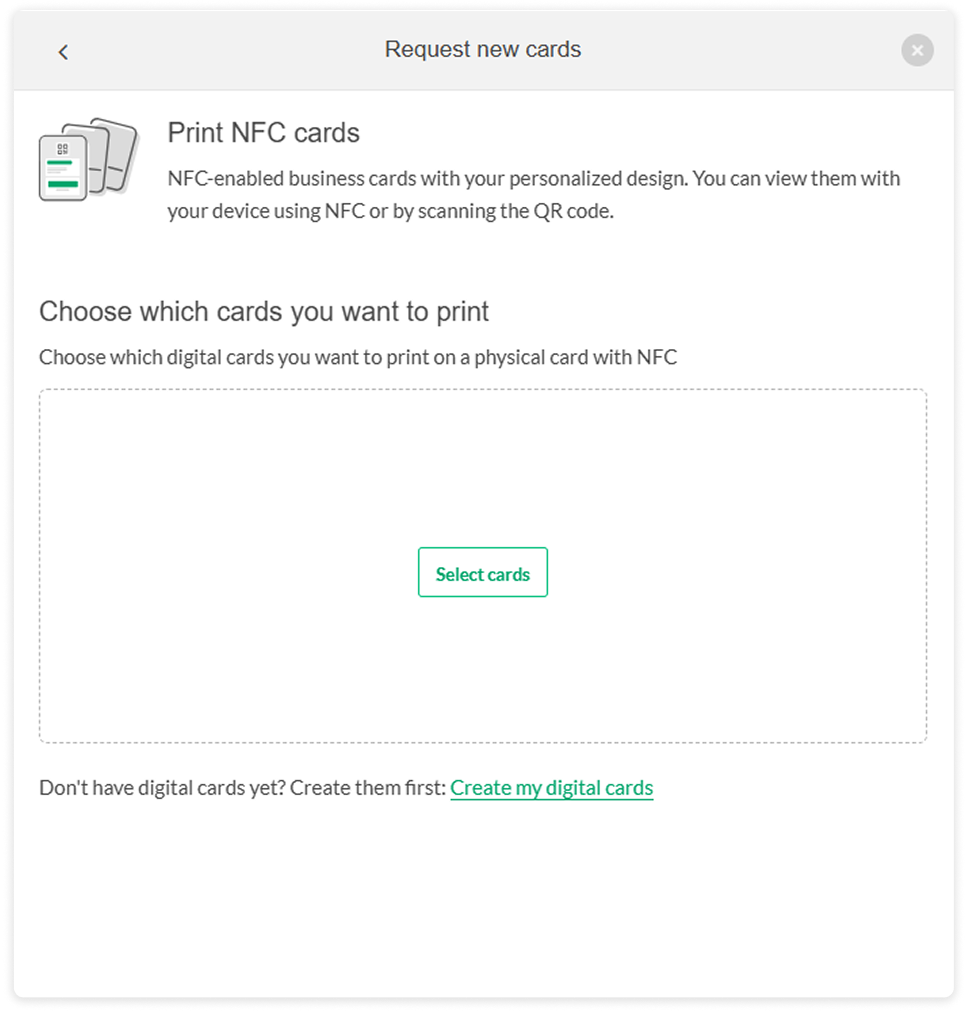
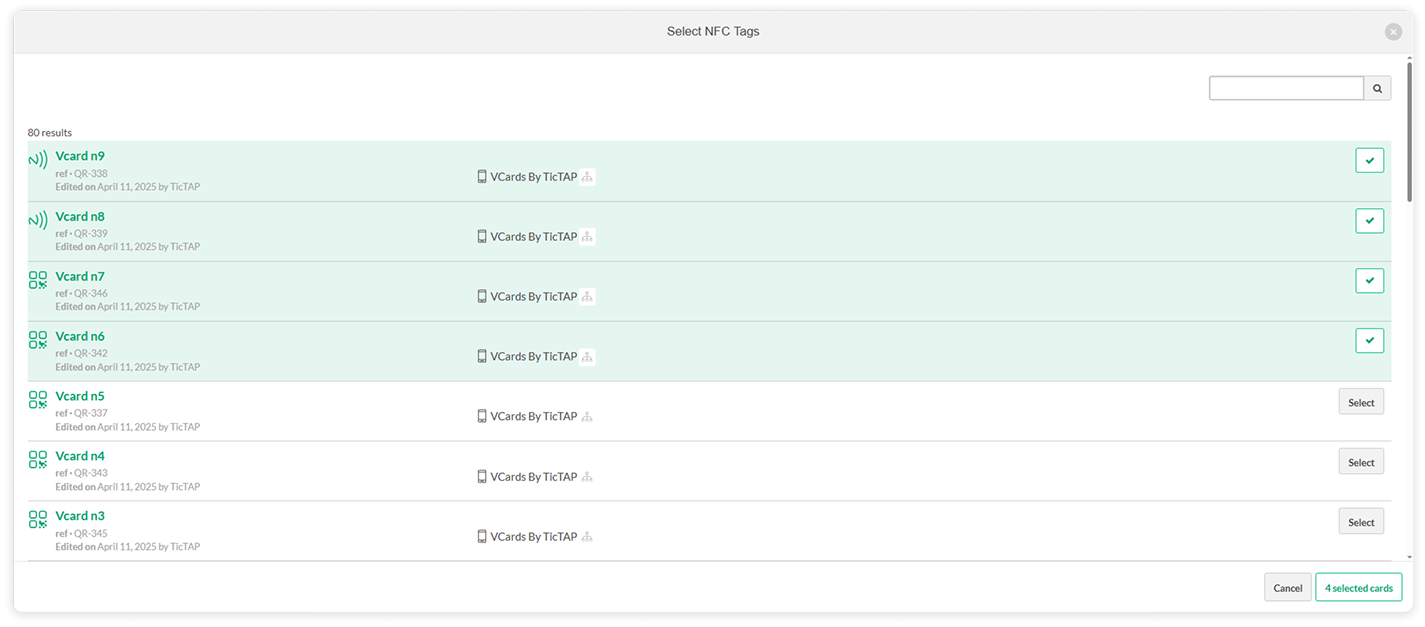
3. Now let's print the existing cards by clicking the "Select cards" button.
4. Select the digital cards you want to print.
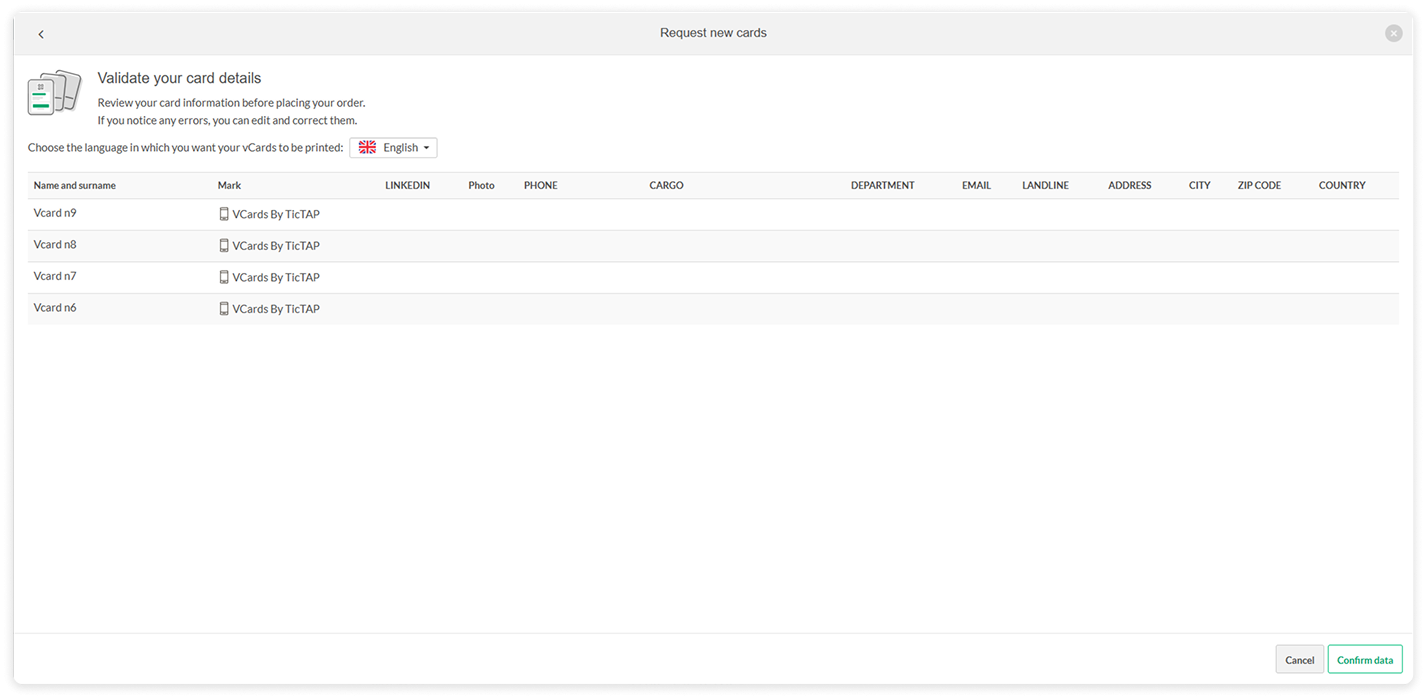
5. Once we finish selecting, we will go to the data preview to verify the printing details. Take your time and verify that everything is correct, as the data will be used on the physical cards.
6. If you need to modify any data, you can go back to the cards page and make the changes there.
[Guide to make changes to vCards](https://help.tictapcards.com/books/card-management/page/edit-the-text-fields-of-a-vcard)
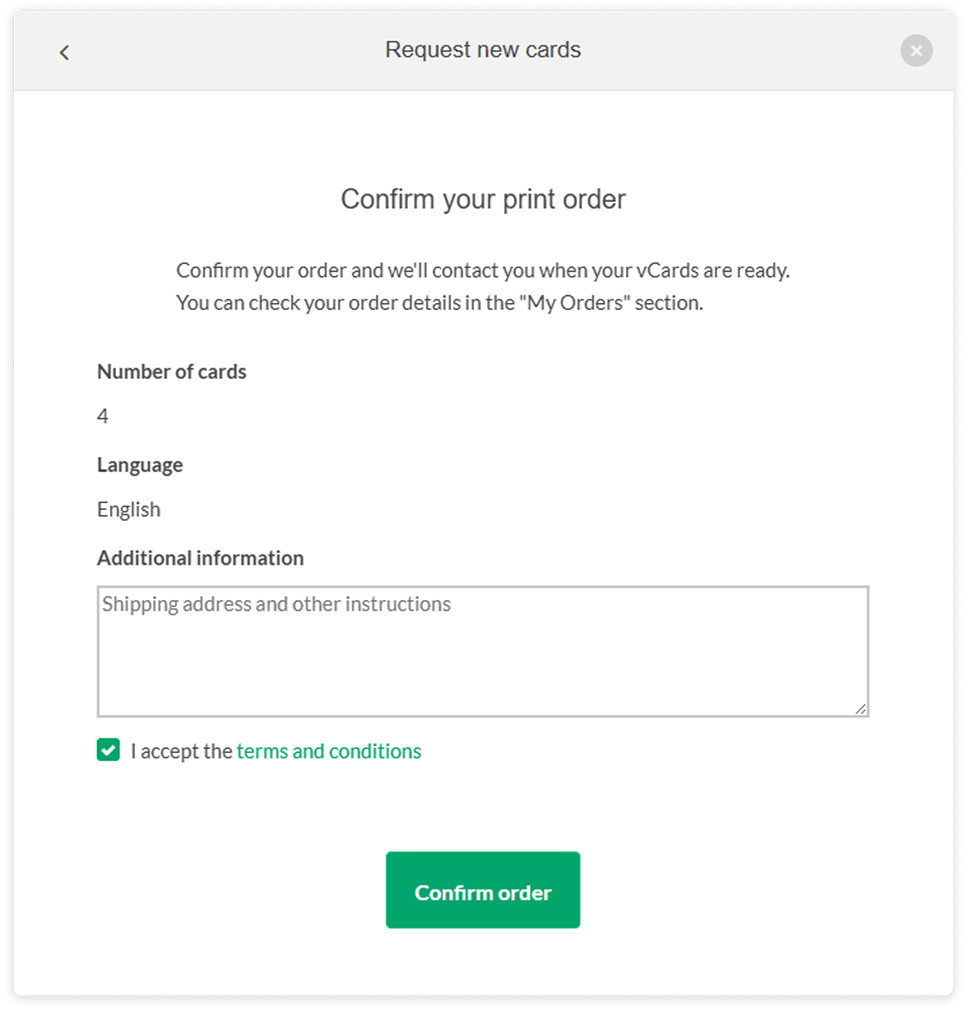
7. If there is anything we should be informed about, don't hesitate! Send us whatever you need, such as the shipping address, in the comments section.
8. Now that we have all the data ready for printing, all that's left is to accept the terms and conditions of the order and everything will be ready! ✨
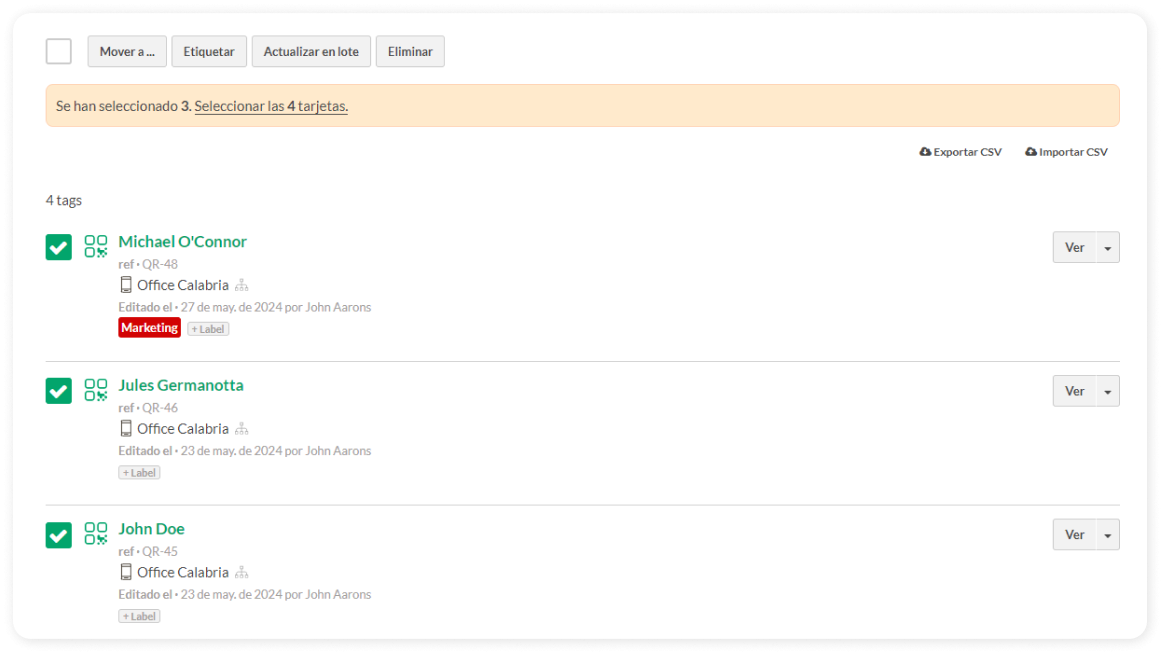
# Add labels to your vcards
**Adding labels to your cards** will help you classify and **organize them by departments** or areas, making them easier to distinguish and filter.
To create a label, follow these steps:
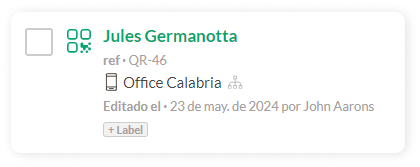
1. Access the **Cards** list from the left sidebar menu, and click on the *+ Label* button on the card where you want to add it.
[](https://help.tictapcards.com/uploads/images/gallery/2024-06/vMVB3MqiAGxLTVZy-label.png)
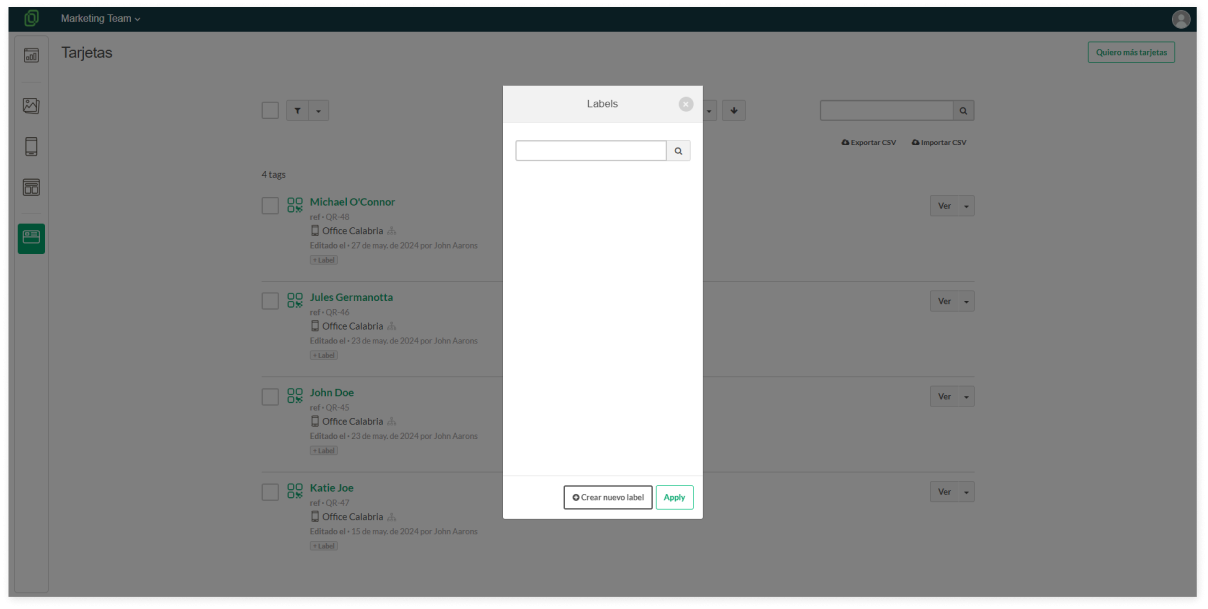
2. Click on **Create new label**.
[](https://help.tictapcards.com/uploads/images/gallery/2024-06/rsuaZbhCFtf6Hzpo-frame-23585-2.png)
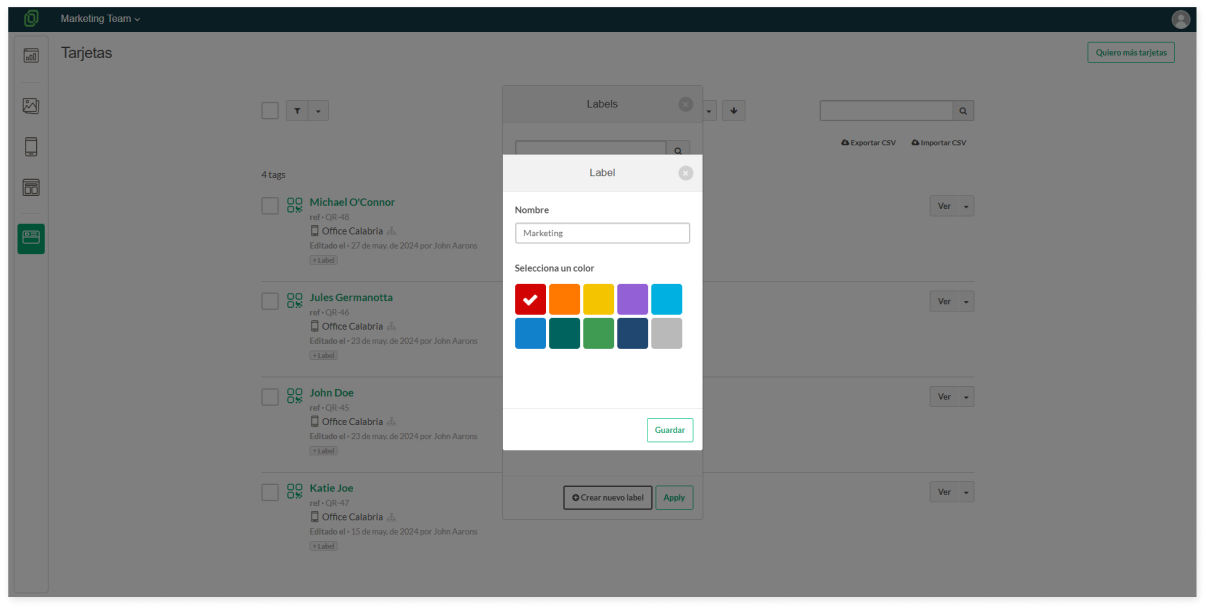
3. Name your label and choose its color.
[](https://help.tictapcards.com/uploads/images/gallery/2024-06/DcSCTqoSxQPRbeqi-frame-23586-2.png)
4. All set! You can now see the new label assigned to the card.
☝️ **Batch Tagging**: If you want to assign the same label to multiple cards at once, select all the cards you want and click on the "Tag" button located at the top of the page.
[](https://help.tictapcards.com/uploads/images/gallery/2024-06/hhvmDZKmGrhDtcig-etiquetar-en-lote-2.png)