# User Management
Manage members and their roles within the platform
# Role management
You can **edit the roles of team members** to decide what kind of **permissions** these members have.
To manage team member roles, follow these steps:
1. Access the **Users** section from your team's dropdown menu.
[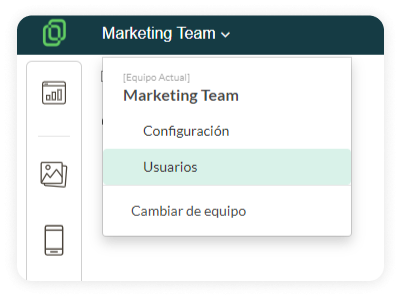](https://help.tictapcards.com/uploads/images/gallery/2024-06/YM3T5TeBOpkNtx3z-dropdown-1.png)
2. Click on the **user tag**, and choose the preferred role type for the user:
**Administrator**: Can manage team members, in addition to what a normal member can do.
**Normal**: Can manage labels, apps, templates, and cards.
[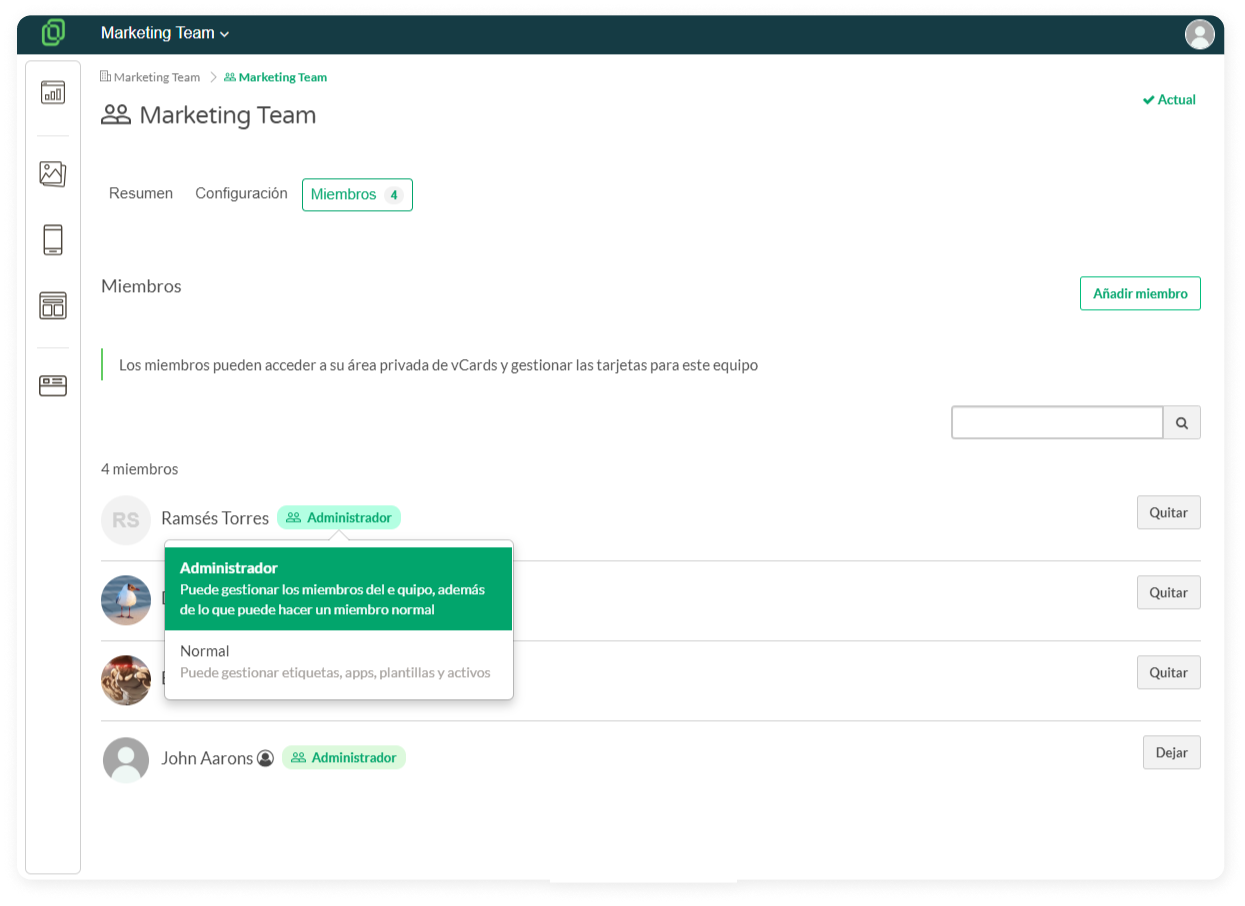](https://help.tictapcards.com/uploads/images/gallery/2024-06/Hj2YvZVk1JONVpys-marketing.png)
All set! You have successfully modified the role of a user in your team. 🎉
# Create an app user
### **What is an app user?**
The vcard is a versatile tool that allows users to access essential contact information without needing to log into the application. However, by **logging in with an app user**, a series of additional functionalities are unlocked that enrich the user experience. These exclusive features include:
- Access to the **User Profile**
- The [Contact Scanning](https://help.tictapcards.com/books/smart-contact-scanner/page/scan-cards) function developed with artificial intelligence
- The **FAQ section**, which provides quick and helpful answers to common queries
To log into a vcard, an invitation must first be sent to the corresponding user, and the user must then activate their account. To do this, follow these steps:
### **Create an app user for a vcard**
Tasks to be performed by the team administrator:
1. **Access the list of cards** of your employees
2. Select the card you want, and select **"Create app user"**.
The recipient will receive an email with the steps to follow for activating the vcard.
[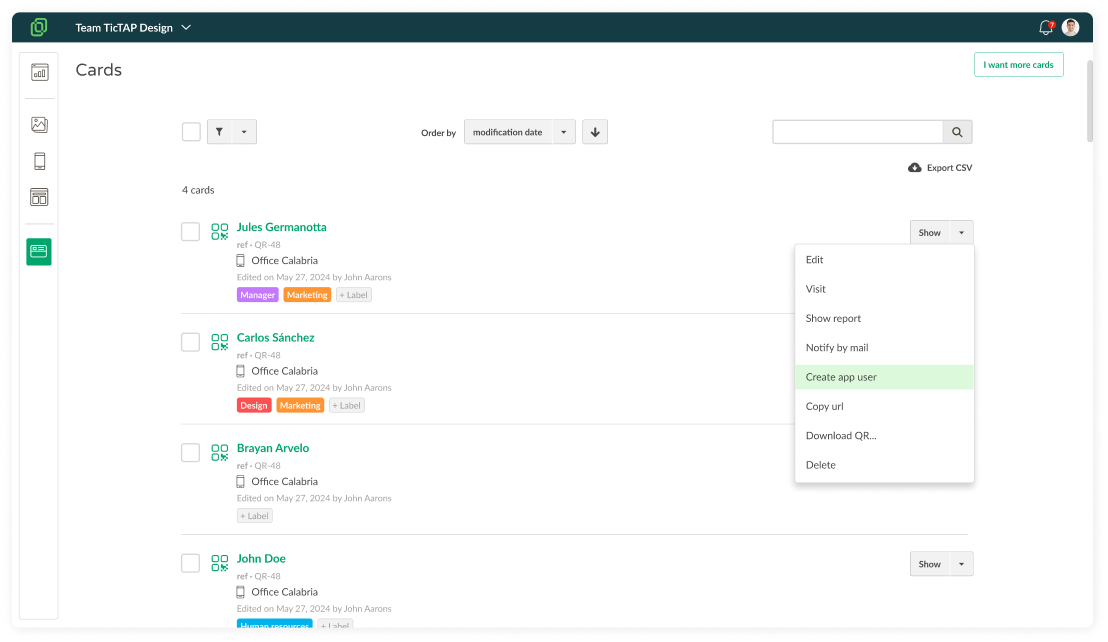](https://help.tictapcards.com/uploads/images/gallery/2024-07/YzSmoTt3nbNK2WLu-cards-1.png)
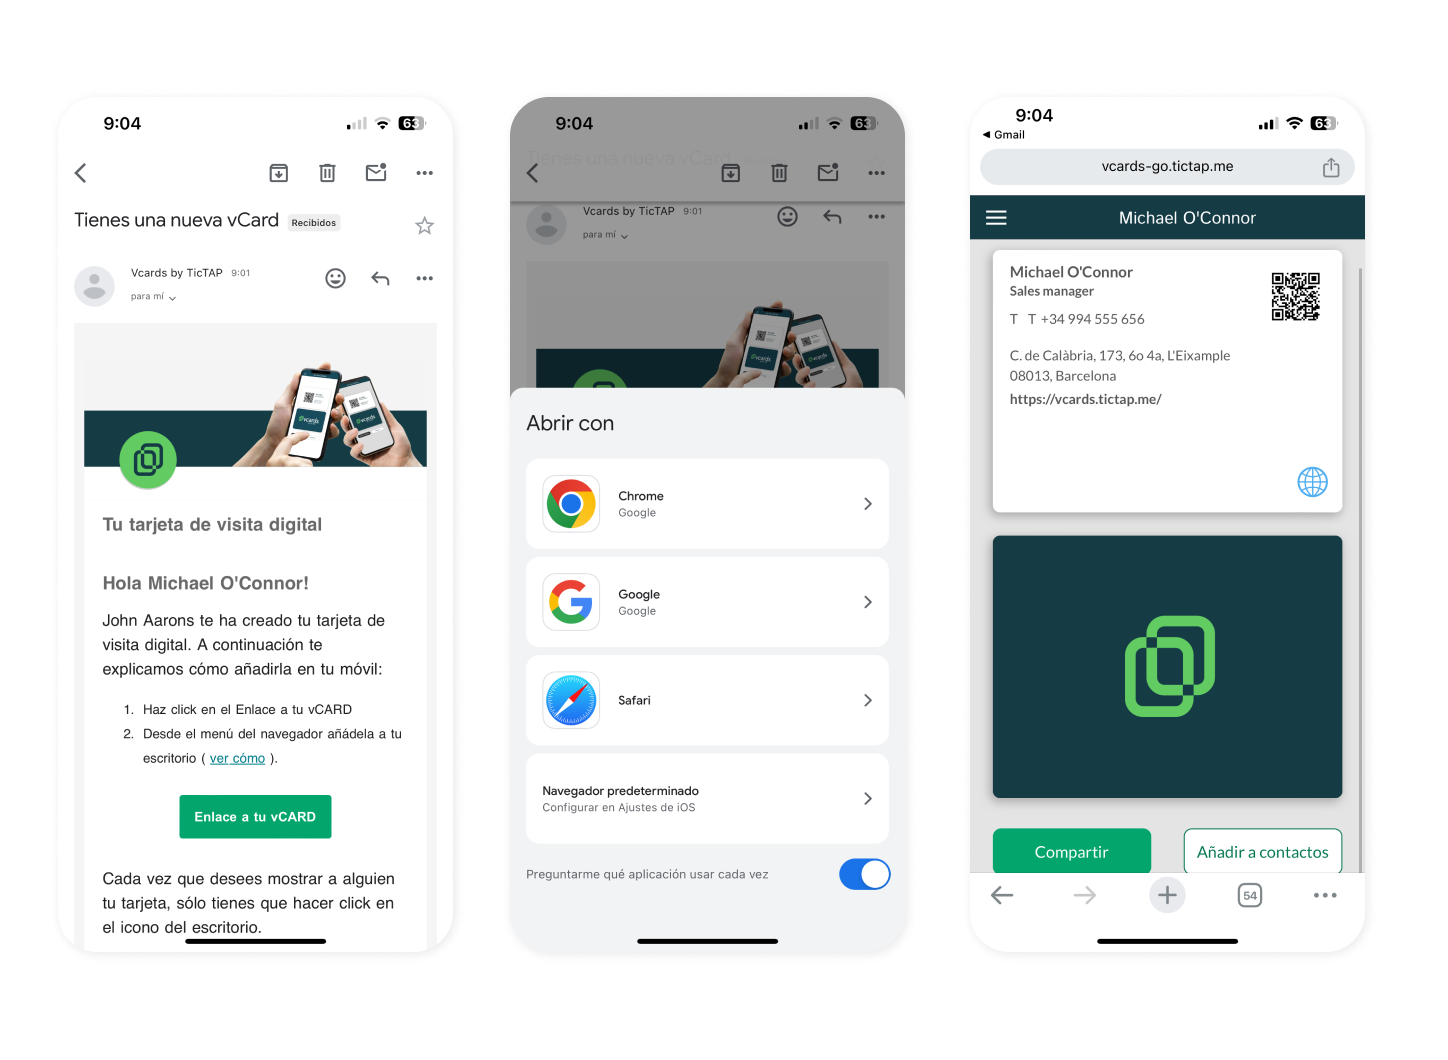
# Send vcards to your employees
Have you created new vcards and want to send them to all your employees? Or perhaps a new employee has joined your team and you want to send them their vcard? Below, we explain how to do this efficiently.
### Steps to Send vcards via Email
1. **Access the card list** from the left sidebar menu.
2. Click on the dropdown button on the right and select **"Notify by mail"**.
[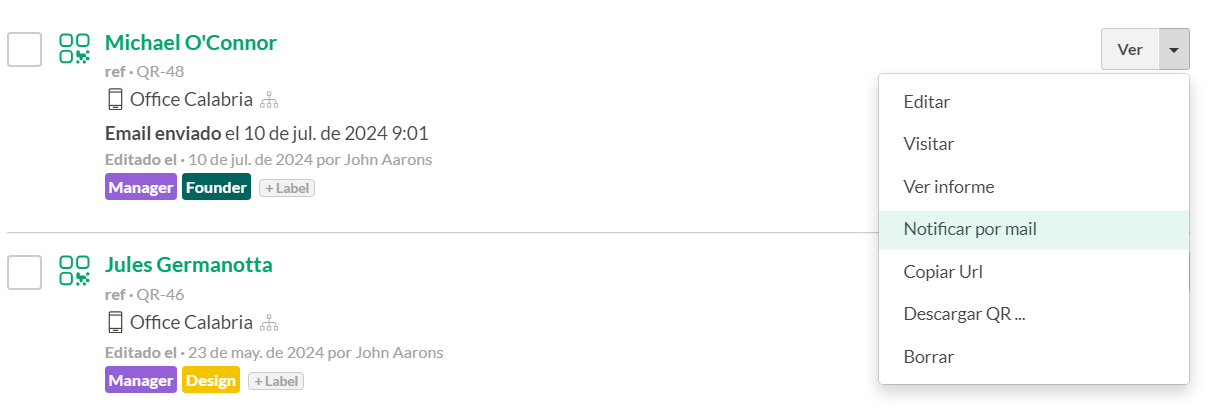](https://help.tictapcards.com/uploads/images/gallery/2024-07/37R2Ix0F5lz88u0C-group-24784.png)
> ☝ **Note:** To notify multiple employees at once and speed up the process, select multiple cards simultaneously.
### What Happens After Email Notification
Once you have selected "Notify by mail," the email associated with the vcards will receive a welcome email with a button to open the vcard.
[](https://help.tictapcards.com/uploads/images/gallery/2024-07/rpTZwY24LBlAQWmb-open-vcard-desktop-1.png)
> ☝ **Note:** We recommend following this process from a mobile device, as it will allow you to save your vcard and access it more easily.
### Instructions for Recipients
The recipient should open the vcard from the email and save it to their device's home screen. For more details on how to do this, check our article: [How to add my vcard to the Home Screen?](https://help.tictapcards.com/books/frequently-asked-questions/page/how-to-add-my-vcard-to-the-home-screen-of-my-mobile)
# Activate my app user
In this article, we will guide you step-by-step to **activate your account and access your vcard**. This process includes initial activation from an email, acceptance of terms and conditions, creation of an unlock pattern, and finally, accessing and setting up your account. Follow each of the steps described below with their respective images to complete the activation of your user in a simple and quick manner.
Step 1: Open the email you have received and press the "Activate my account" button
Step 2: Accept the terms and conditions
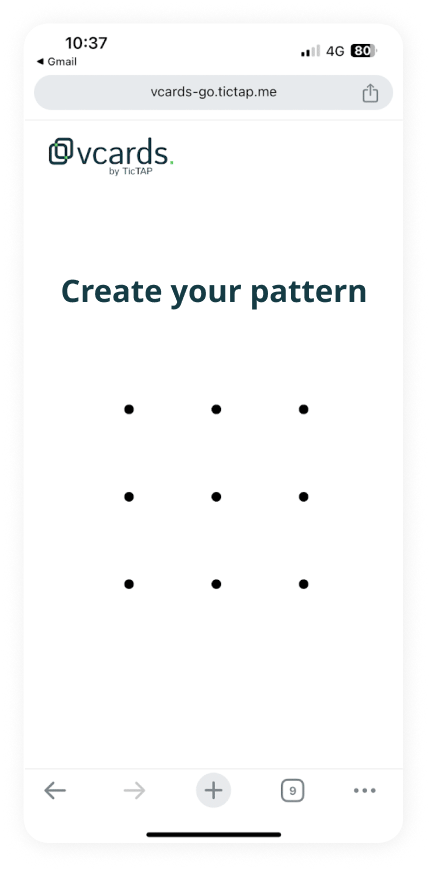
Step 3: Create an unlock pattern
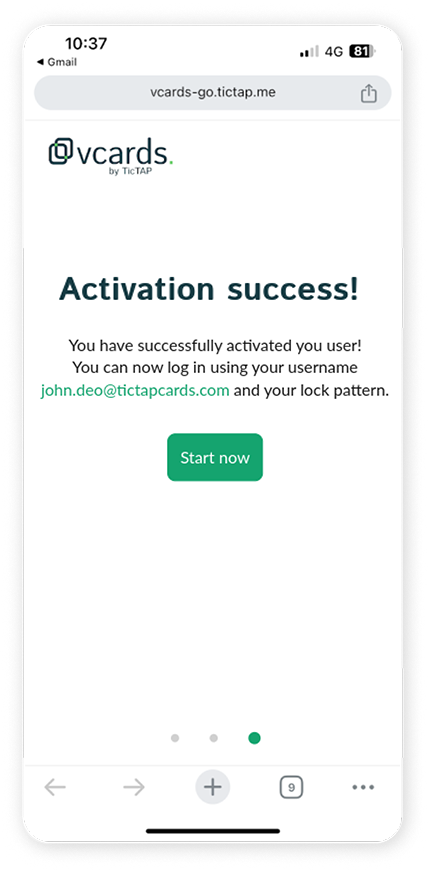
Step 4: Your user is now activated, access your vcard
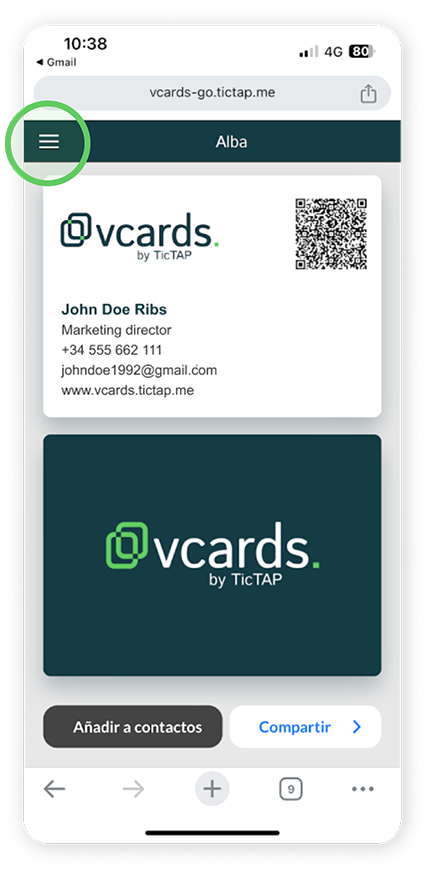
Step 5: Visit your vcard with your active user
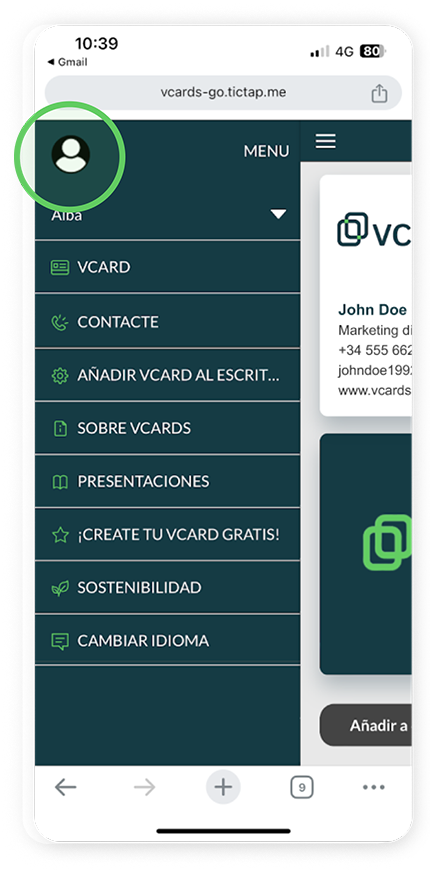
Step 6: Access the side menu
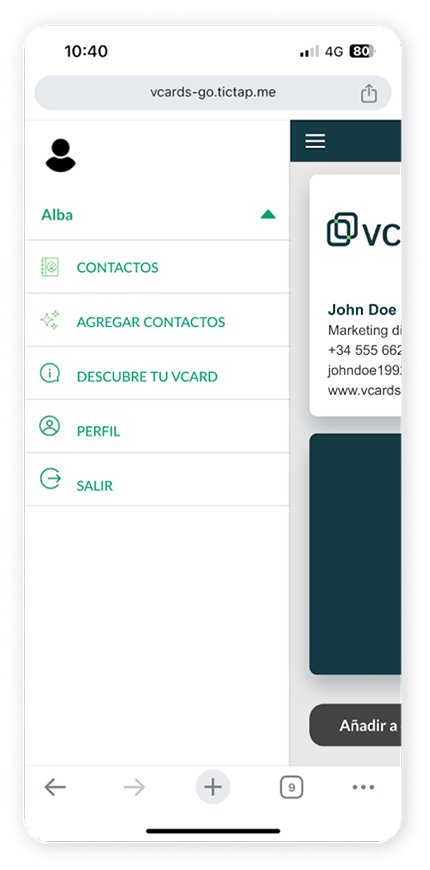
Step 7: Access the user menu. In this menu, you will find your contact list and the link to add new contacts